macOS Display Scaling Explained

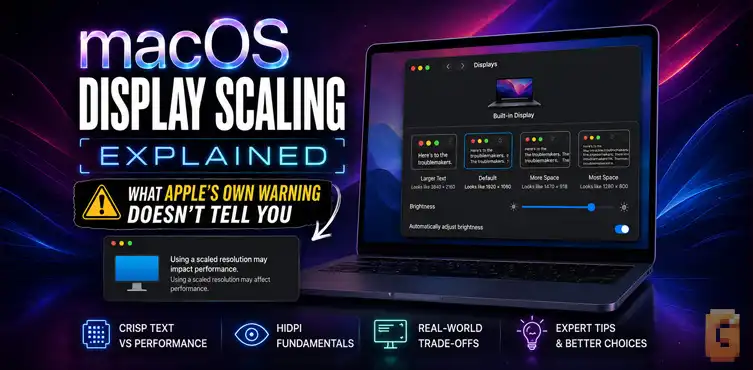

15-inch MacBook has a native 2880 × 1864 display, but macOS limits everyday choices to scaled options like 1920 × 1243 for readability. macos display scaling explained simply means the system renders a virtual higher-resolution interface then maps it to the physical pixels so text stays sharp. You can unlock the full native resolution, but Apple’s performance warning is real and tied to how the GPU works.
macOS Display Scaling Explained: What Apple’s Own Warning Doesn’t Tell You
This article walks through macos display scaling explained using a real, specific example: a 15-inch MacBook Air running the current macOS Tahoe.
Three questions come up constantly around this exact scenario: Why does Apple advertise 2880 × 1864 but only let you pick up to 1920 × 1243? How do you actually reach the full native resolution on Tahoe? And is this just a MacBook Air thing, or does the same logic apply to external 4K monitors and everyday work? We’ll hit all three directly.
If you just unboxed a 15-inch MacBook Air, you probably looked up the specs and saw “2880 × 1864.” Then you opened System Settings > Displays and the highest option stopped at something like 1920 × 1243. That mismatch is one of the most common “wait, what?” moments with modern Macs.
We’ll cover why the numbers don’t match, how to get the native resolution if you want it, what Apple’s vague performance warning actually means, why some external monitors lose scaling options, and the practical choices that matter in real apps.
What Display Scaling Actually Does (HiDPI)
macOS display scaling is the system that lets a high-pixel-density screen show comfortable-sized text and icons instead of microscopic ones.
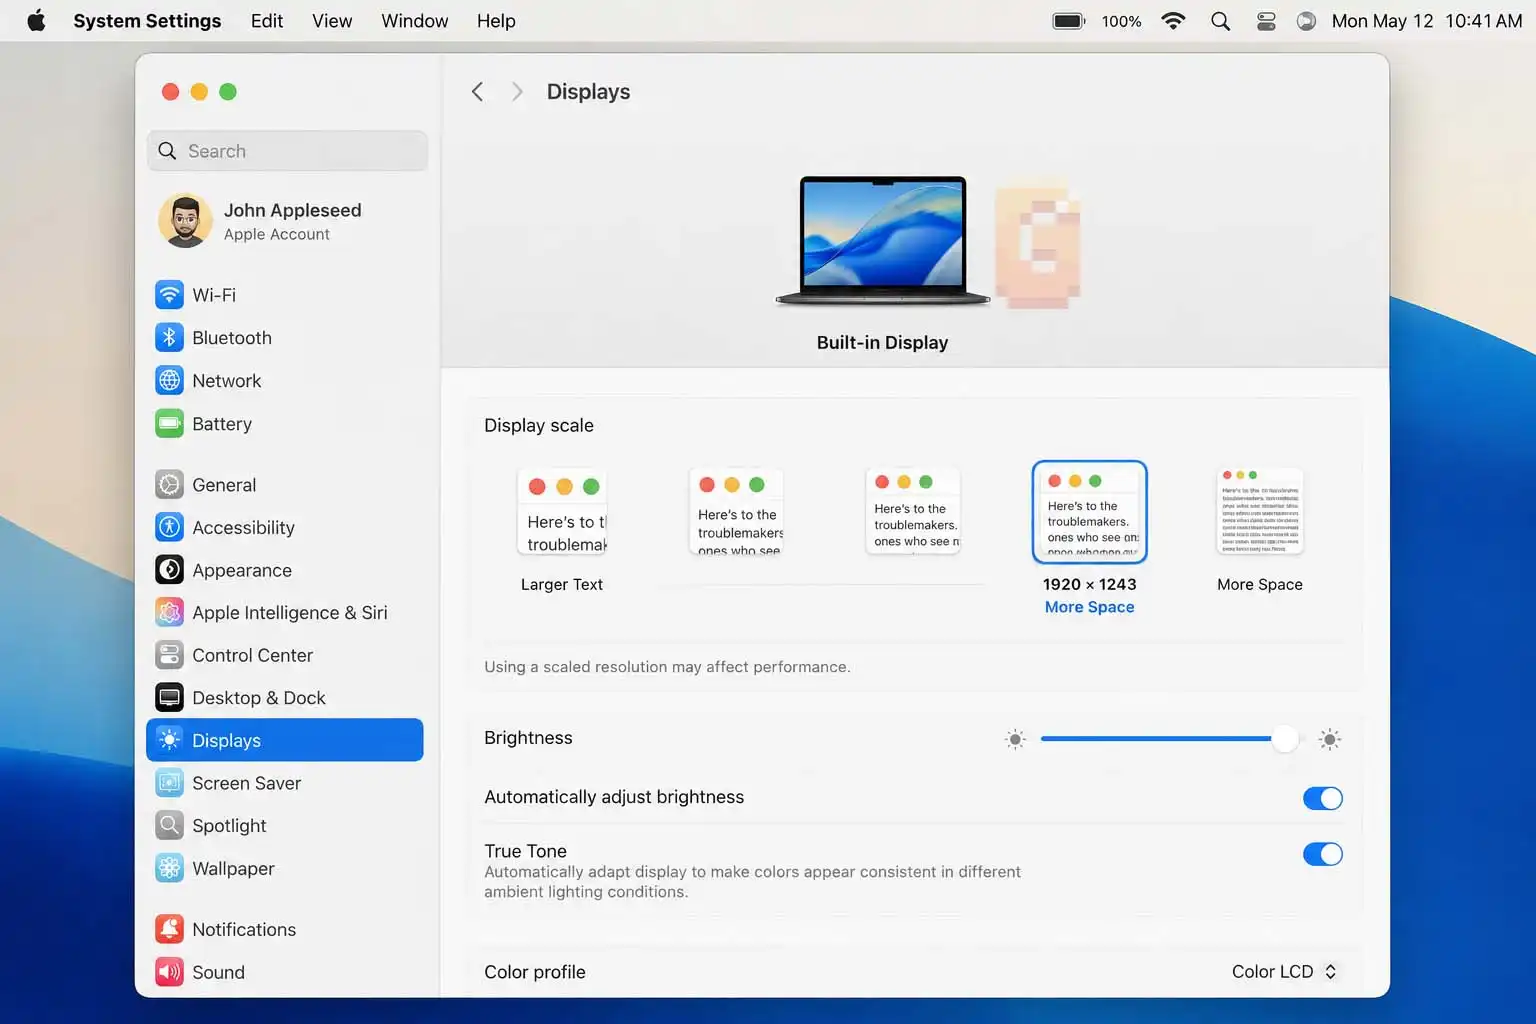
On a Retina panel the physical pixels are packed tightly (about 224 ppi on the 15-inch MacBook Air). If the operating system drew the interface at a 1:1 pixel mapping, every menu, button, and letter would be tiny. So macOS invents a logical resolution—the size the UI “looks like”—and renders the interface at a higher internal resolution, then maps those pixels cleanly onto the real panel. That clean 2× mapping is what people call HiDPI or Retina scaling. On the 15-inch Air the common scaled options include:
- Default around 1710 × 1107
- More Space at 1920 × 1243
- And the true 2× Retina point near 1440 × 932
The 1920 × 1243 setting is the highest “More Space” choice Apple surfaces by default. It still uses all 2880 × 1864 physical pixels underneath, so the image stays sharp. The interface simply behaves as if the screen were a lower-resolution panel with more desktop real estate. That’s the core of macos display scaling explained in everyday terms: logical size for comfort, physical pixels for sharpness.
What “Using This Resolution May Affect Performance” Actually Means
Apple’s own support page states: “Using a scaled resolution may affect performance.” That sentence appears with almost no further detail.
Here is what it actually refers to. When you pick a non-exact HiDPI multiple, macOS often renders the entire interface into a larger virtual framebuffer and then downscales it in real time to match the panel. That extra rendering pass is genuine additional GPU work compared with a clean native or exact 2× mode.
When you pick a non-exact HiDPI multiple, macOS often renders the entire interface into a larger virtual framebuffer and then downscales it in real time to match the panel. That extra rendering pass is genuine additional GPU work compared with a clean native or exact 2× mode.
That’s the same frame buffer and rendering-pass concept covered in more depth in our breakdown of how video game frames are rendered — just applied to your desktop instead of a game engine.
On Apple silicon the hit is usually small for everyday use—scrolling, windows, Safari. But it is measurable in GPU-bound workloads or on older machines. The warning is not marketing fluff; it is a polite way of saying the compositor is doing more math than a 1:1 or perfect 2× mapping would require. This is the strongest differentiator most guides skip. Once you understand the render-then-downscale step, the warning stops feeling mysterious.
Why Some Monitors Don’t Get Scaling Options At All
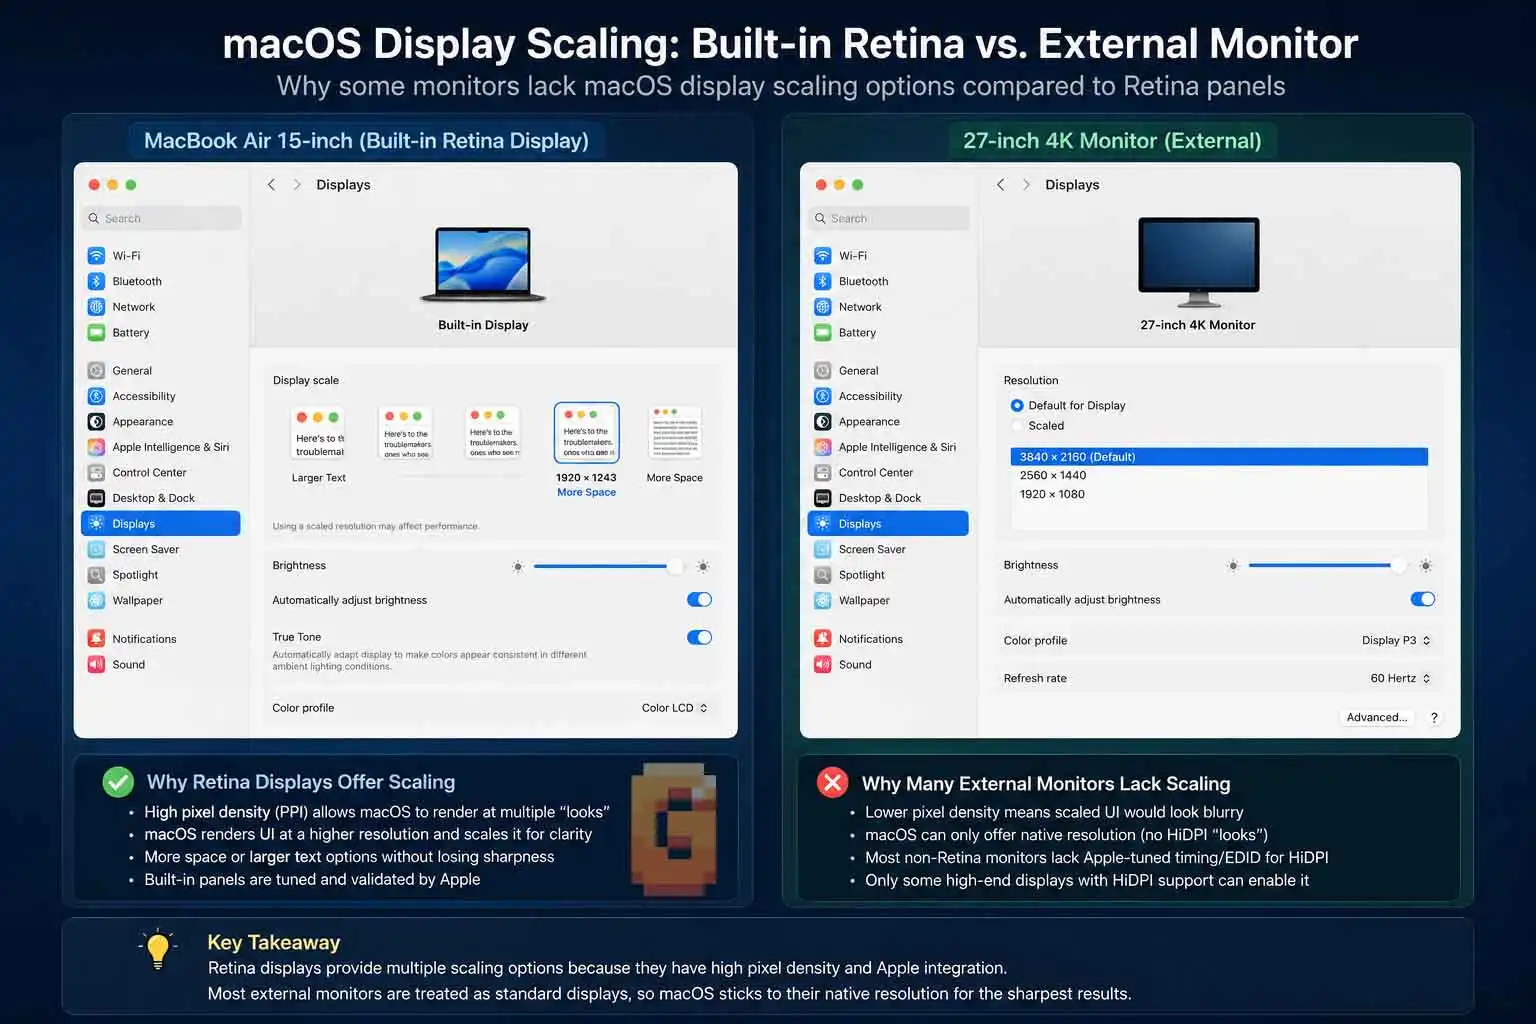
macOS decides internally whether a display qualifies as “Retina.” That classification depends heavily on pixel density.
Built-in MacBook panels and Apple Studio Displays clear the bar easily. Many third-party 4K or 1440p monitors do not. When macOS does not treat the display as Retina-capable, you lose the smooth intermediate “looks like” scaled options. You are left choosing between the panel’s native resolution (often too small) or exact integer multiples that rarely match comfortable viewing distances.
The result is the classic complaint: “My external monitor only shows two choices and both look wrong.” The operating system is not broken; it simply refused to offer the fractional HiDPI modes it considers non-Retina. Third-party tools can sometimes force additional modes, but the decision starts inside macOS’s display classification logic.
When Scaling Actually Slows Your Mac Down (The App-Rendering Problem)
The performance warning becomes concrete in certain applications.
A documented case discussed in Adobe’s own community forums involves Lightroom. At certain intermediate scaling percentages (especially values just above 100 %), the application can end up rendering its interface at nearly double the necessary resolution. The OS has already asked for a larger virtual canvas; Lightroom then treats that canvas as the working size. The result is an avoidable performance hit that disappears when the user switches to a cleaner 100 % or 200 % equivalent scaling.
This is not theoretical. It is a real, measurable extra workload that only appears under specific scaled resolutions. Creative apps that do heavy UI drawing or large canvas work are the places where the abstract “may affect performance” warning turns into lag you can feel.
How to Pick the Right Scaling for Your Monitor
For the 15-inch MacBook Air the practical path is simple;
Start with the default or the 1920 × 1243 More Space option. Most people find one of those two comfortable. If you want every last pixel of desktop space and do not mind tiny UI elements, unlock the native 2880 × 1864.
On macOS Tahoe the steps remain the same:
- Open System Settings > Displays.
- Hold the Option key and click Scaled (this reveals the full list).
- Switch to list view if needed.
- Scroll to 2880 × 1864 and select it.
At native resolution everything is sharp but small. Text will require zooming in many apps. Most users return to a scaled setting after a few minutes.
For a typical 27-inch 4K external monitor the decision framework is different. The cleanest HiDPI choice is usually “looks like 1920 × 1080.” That gives true 2× sharpness. The popular “looks like 2560 × 1440” option is the intermediate scaled mode that triggers the performance warning because of the larger virtual framebuffer. Try both for a day and watch how your GPU fans and app responsiveness behave.
The Simplest Way to Think About Mac Display Scaling
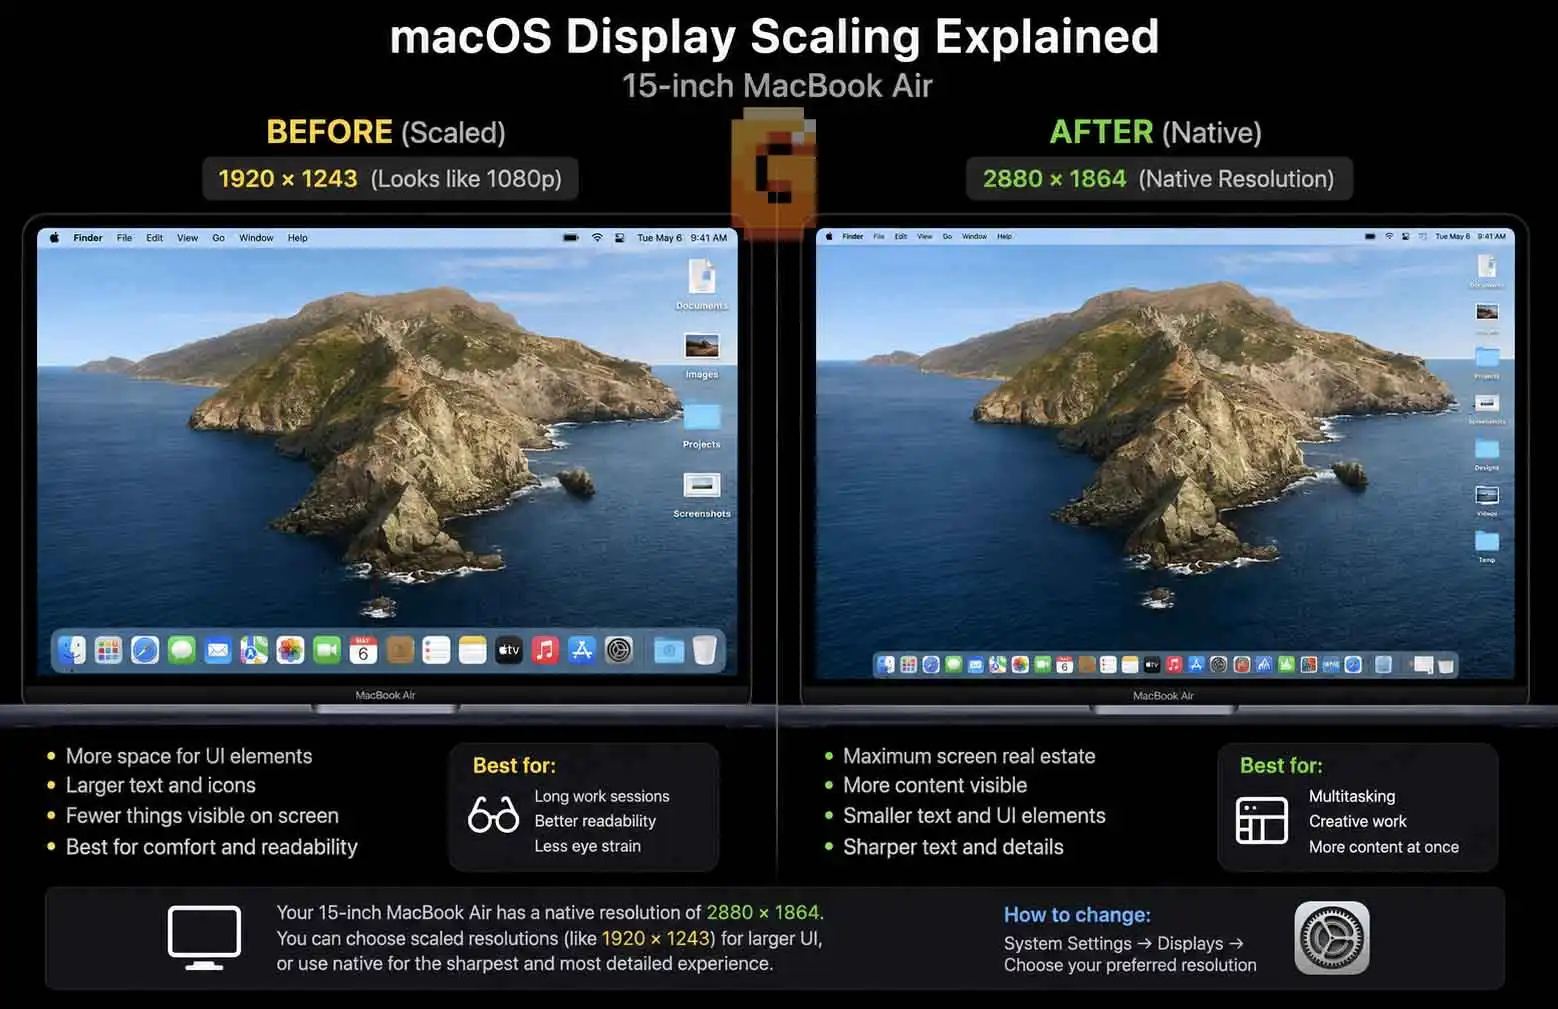
Treat the numbers Apple lists in the marketing specs as the physical panel. Treat the numbers you see in System Settings as the logical size of the interface.
The idea behind macos display scaling explained is the bridge between those two numbers. When the bridge is a clean 2× HiDPI mapping, quality and performance stay excellent. When the bridge is an intermediate scaled mode, you gain flexibility in UI size but pay a small rendering tax and, in a few apps, a larger one.
On the MacBook Air 15-inch the 1920 × 1243 option is Apple’s practical maximum for everyday use. Native resolution is available if you dig for it. External monitors follow the same rules once you understand Retina classification.
If you are still on the fence, set the display to More Space for a week, then try native for a day. Your eyes and your workflow will tell you which side of the trade-off you prefer.
FAQ
Why does my MacBook Air only go up to 1920 × 1243 when Apple says 2880 × 1864?
Apple surfaces the highest comfortable scaled resolution by default. Native 2880 × 1864 is available after holding Option and choosing list view in Displays settings.
Does using a scaled resolution affect performance on never Macs?
Yes, intermediate scaled modes require the GPU to render a larger virtual image and downscale it. The impact is usually minor on Apple silicon but real in some creative apps.
How do I get full native resolution on macOS Tahoe?
System Settings > Displays, hold Option while clicking Scaled, switch to list view, and select 2880 × 1864.
Why doesn’t my external 4K monitor show the same scaling options as my MacBook?
macOS only offers the full set of smooth HiDPI intermediate options on displays it classifies as Retina based on pixel density.
Is the default setting the best for most people?
For the 15-inch MacBook Air the default (around 1710 × 1107) or the More Space 1920 × 1243 option works well for most users. Native is best only if you want maximum desktop space and can tolerate tiny UI elements.
Conclusion
macos display scaling explained comes down to a deliberate design choice: keep the interface readable while still using every physical pixel for sharpness. On the 15-inch MacBook Air that choice surfaces as 1920 × 1243 instead of the raw 2880 × 1864. Apple’s performance warning points to real extra GPU work on scaled modes. Some monitors lose options because of Retina classification. And a few apps, notably Lightroom in intermediate scales, can render more than necessary.
Resolution is only half of what’s in that Displays panel — our guide to the best MacBook color settings for everyday use covers the other major setting worth understanding while you’re in there.
The next step is simple. Open Displays settings right now, hold Option, and try the native resolution for five minutes. Then switch back to More Space and decide which feels better for your eyes and your work. Once you understand the trade-off, the settings stop feeling arbitrary.
References
Apple Support: Change your Mac display’s resolution
Adobe Community forums: Discussing Lightroom scaling behavior
AppleInsider: Technical explanations of HiDPI rendering